


Today I’m sharing with you a tutorial for one of my favorite pretty treats: royal icing decorated cookies! I’ll teach you how to adorn yummy, no-spread sugar cookies with colorful florals and some gold luster dust detailing. You don’t have to follow my design precisely if you don’t want to. Instead, feel free to get creative and let the cookies inspire you (like, with this 3D cookie teacup set!)
This is one of my favorite no-spread cookie recipes. In fact, I used it here, last fall, to make 3-D pumpkins with buttercream. Plus, in this tutorial, I’ll share with you my secrets to achieving the perfect consistency of royal icing – every time!
So, let’s get started!
First, read through my helpful royal icing method and tips section – don’t forget to check out the video, too! Then, peruse the tools list to make sure you have all of the equipment necessary, before getting started.
Finally, when you’re ready to bake, you can find my printable recipe card with the exact measurements and ingredients you’ll need. Most importantly, have fun and enjoy!
P.S. Don’t forget to scroll all the way to the bottom of this article for more close-up photos of each of the cookies in this set! 🙂
How To Make Royal Icing Decorated Cookies – Method & Tips
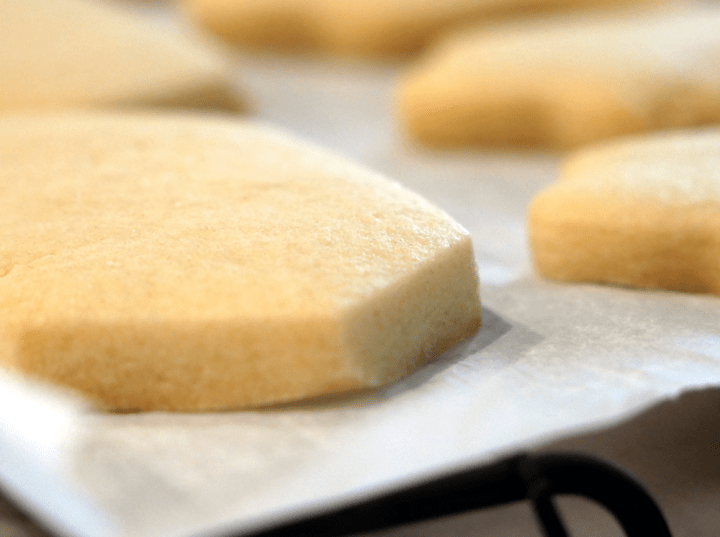
Bake The Sugar Cookies
To begin the dough for your cookies, sift together your flour, corn starch, and salt. We use corn starch to soften the protein of the flour, giving you a lighter, more tender final cookie. Then, cream your butter, cream cheese, and sugar together, followed by the extracts and eggs – added one at a time, so as not to break your emulsification. Finally, you’ll add the flour mixture to the wet ingredients, combining gently with a spatula until a dough begins to form.
Dump the dough onto a sheet of plastic wrap, kneading it gently until it mostly comes together, in the shape of a somewhat-flattened disc. Then, chill the wrapped dough in the freezer to chill for 30-45 minutes. This allows the dough to hydrate and come together, as well as making it easier to cut into shapes. Once the dough is firm to the touch, roll it out on a silicone baking mat and stamp out your shapes, placing them on a parchment paper-lined baking sheet.
PRO TIP: If your dough begins to get too soft at any time while you’re working with it, place the whole baking mat/baking sheet back into the freezer for a few minutes. This, again, keeps the lines and edges of your cookies sharp and clean.
Once the cookies are all stamped out, freeze them again for 10 minutes or so, after which you’ll place them directly into the oven to bake. Be sure to let your cookies cool fully before adding any royal icing. Otherwise, you’ll have a melty mess on your hands!

Prepare Your Royal Icing
First, mix your powdered sugar with some cream of tartar – this helps stabilize the finished icing and brighten the white color. Then, you’ll stir in – by hand – the egg whites, to avoid a flurry of powdered sugar when you turn on the mixer. Once the sugar is moistened, turn your mixer, fitted with the whisk attachment, on low to combine the ingredients. Then, scrape down the sides, and set your mixer on high for 2-3 minutes.
PRO TIP: As soon as you are finished using your royal icing, cover it with plastic wrap touching the surface of the icing. This rule stands from the first step to the last, whether you are working with a large amount, or mixing tiny bits of color. Always cover your royal icing immediately or it will begin to harden and become unusable.
Next, plan or sketch your cookie design, thinking of each color as a separate layer: base (background color), main design (second layer), and finishing details (third layer.) Unless you want the colors to blend and bleed into each other, you’ll need to let the base color dry before adding a second layer, and so on. When you’re first starting out, it’s easiest to limit the number of colors your design utilizes – try choosing two or three, maybe adding a fourth for the final layer details.
At this point, you can fit some piping bags with a coupler and a small, circle piping tip. I’ve linked my favorites in the next section. A coupler allows you to easily exchange one tip for another, without having to first empty the bag of icing. Here’s a diagram showing you how to fit a piping bag for your first time (pardon the grammatical errors; I borrowed it from the Kootek Decorating Bag listing on Amazon.)

Decorating Consistencies of Royal Icing
To decorate the cookies, you’ll need to thin the icing with some water to different degrees, depending on where you’ll use it. I like to split my icing into small bowls, and have a glass of water with a half-teaspoon measuring spoon nearby. Here’s a breakdown of the main royal icing consistencies:
Royal icing straight from the mixer bowl, or with a bit of food coloring gel added, is thick. This is your baseline/starting point. It will drop from an overturned spoon in a large clump.
Borders, fonts, and details are piped with royal icing that is just slightly less thick than straight out of the mixer. We call it outlining consistency. You’ll use it for any text, lines, flourishes, flowers, and the main border of your background color. If the thick, straight-from-the-mixer icing pipes well out of a small-tipped piping bag, go ahead and use it. However, if you find yourself struggling to get it through the tip, thin it out starting with 1/2 tsp of water per cup of icing.
To fill in, or “flood,” large areas of the cookie (like the background/base) you’ll use what we call flooding consistency. This viscosity of flood icing is thinner than outlining. Start by adding 1 1/2 to 2 tsp of water per one cup of icing. You’ll know the consistency is right when it runs off of your spoon (as opposed to falling off in globs), and the “trails” left in the bowl disappear within 10-15 seconds. For larger cookies, the icing can be on the thinner side, but for small cookies, err on the side of thicker, to avoid any overflow as the icing settles.
Of course, the exact consistency and water measurements may vary, depending on the weight of your eggs, amount of food coloring, or other factors. If you thin the icing out too much, you can sift a little bit of powdered sugar back in to thicken it up.

Decorating Your Cookies with Royal Icing
To begin decorating your cookies, use royal icing in outline consistency to create a border around the edge of your first cookie. Then, in the same color, use flooding consistency to quickly fill in the center of the cookie. Be careful around the edges. Tap your cookie onto your work surface a few times to help the icing settle. You can even use a toothpick or scribe tool to nudge some icing into any empty spaces or to create a crisper corner edge.
Outline and flood one cookie at a time to create a perfectly smooth base. Otherwise, if the border dries before the flood is added, a discernible line may remain. Then, let the base dry before adding on your next details, using the outline/flood method for large areas, or only outline consistency for text or small designs.
PRO TIP: If you want to create a tie-dye or swirled look, add your second color of royal icing before the first dries, and use a toothpick to drag the colors to blend. This is often called the “wet-on-wet” technique. You can see an example of that here, on my fall leaf chai-spiced shortbread cookies.
Once your royal icing is hard to the touch, you can add your next layer. However, let the cookies fully dry at room temperature, in open-air before handling them any further. After 24 hours, you can stack the cookies and store them at room temperature in an air-tight container.
To add a metallic touch like the one featured on my monogram “H” cookie, simply mix some luster dust of your choosing with a tablespoon or so of a clear, food-safe alcohol, like vodka. Then, use a food-safe paintbrush to apply the mixture to your cookies, and let dry.

Materials You Need For Royal Icing Decorated Cookies
- Handheld or stand mixer
- Spatula
- Plastic wrap and parchment paper
- Baking sheet
- Rolling pin
- Silicone baking mat
- Cookie cutters – I use this set
- Wire cooling rack
- Piping bags
- Small round piping tips (I like to use a 1 or 3, which you can find in this set)
- Toothpicks
- Food coloring gels – it’s important to use gel, not liquid coloring, to preserve to the consistency of the icing
- Small mixing bowls

Royal Icing Decorated Cookies – Recipe

Royal Icing Decorated Sugar Cookies
Ingredients
No-Spread Sugar Cookies
- 3 cups all-purpose flour
- ¼ cup cornstarch
- ¾ tsp salt
- ½ cup room temperature butter (1 stick)
- 4 tbsp room temperature cream cheese
- ¾ cup white sugar
- 2 eggs
- 1 tsp vanilla bean paste or extract
- 1 tsp almond extract
Royal Icing
- 8 cups powdered sugar
- ½ tsp cream tartar
- 12 tbsp pasteurized egg whites (make sure the carton indicates "pasteurized")
- 1 tbsp vanilla extract
Instructions
No-Spread Sugar Cookies
- Preheat your oven to 375°F.
- In a medium-sized bowl, sift the flour, corn starch, and salt.
- Cream the butter, cream cheese, and sugar together for 4-5 minutes. Then, add the eggs one at a time, finishing with the vanilla and almond extracts.
- Add the dry ingredients to the wet and mix with a spatula until a dough forms.
- Dump the dough onto a piece of plastic wrap, kneading it together a few times into a flattened disc shape. Wrap tightly and let chill in the freeze for 30-45 minutes.
- Roll the dough out on the silicone baking mat to about ½-inch thick. Cut out your cookies with the cookie cutters, placing them onto a parchment paper-lined baking sheet. If the dough starts to get too soft, put it back in the freezer to firm up for a few minutes.
- Before baking, place the whole cookie sheet into the freezer for 5-10 minutes. Then, bake the cookies for 8-11 minutes. The edges will turn slightly golden when done. Larger cookies may take a little longer than small ones, so watch the cookies carefully.
- Let the cookies cool on the wire rack completely before icing.
Royal Icing
- Mix the cream of tartar and powdered sugar together. Add the egg whites, and mix by hand to moisten.
- Then, with the whisk attachment, turn your mixer on low and beat for a minute. Turn the mixer up to high, and continue to beat for 2-3 minutes.
- Add your vanilla, and mix to combine.
- Immediately cover the surface of the icing with plastic wrap any time you aren't using it.

Enjoy Your Royal Icing Decorated Sugar Cookies
Happy decorating! I hope you enjoy making these cookies as much as I do. Not only are they a fun culinary craft to create on a rainy day, but they also make phenomenal gifts!
You can personalize them for different occasions and themes, too. Or, you can contact me to order some! Fill out the form below with some preliminary details, and I’ll get back to you to chat further!

If you’re looking for another cookie decorating idea, be sure to check out my cookie teacup set, here!
And, don’t forget to find me on Instagram so we can keep in touch. Be sure to tag me in any photos you post of your cookies! I love to see your works of culinary art.
Plus, if you liked this article, feel free to enter your email below to receive notification of my next blog post like this one. You don’t want to miss it!
Take care guys! Until next time…
XOXO

P.S.
See my privacy policy for the full Amazon Affiliate disclosure. Profits earned from affiliate commissions help to keep this site running, so that I can continue to bring great content to awesome readers, like you! If you would like, you can still support by clicking through this link and making any other purchases you need. 🙂
P.P.S
Addicted to Pinterest, like me? Pin one of the images below to save this recipe for later or show it to your friends. After all, sharing is caring. 😉


Pingback:Palette-Knife Painted Royal Icing Cookies — Mini Monet Art & Easels
I love this recipe! Thanks so much for all the detailed info my cookies turned out great.
Thank you for saying so! I’m so happy to hear that! 🙂
Pingback:royal icing cookie decorating - Tontem
Pingback:How To Watercolor Paint on Royal Icing - Sound of Music Cookie Set
Pingback:Peach-Filled Spring Cupcakes with Brandy Buttercream Flowers