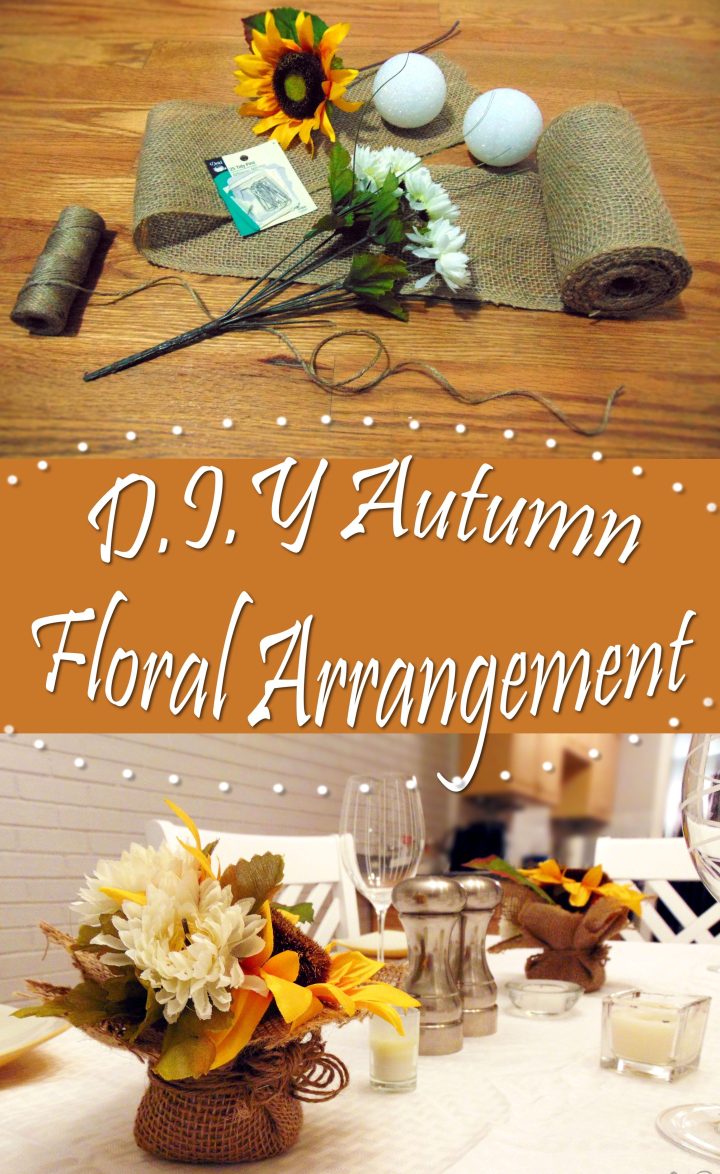
I love autumn (previously discussed here). As soon as I see one leaf start to fade from green, it seems as if a switch is flipped in my mind and all I can do is hold myself back from going completely fall-crazy.
Already I had planted mums (here), pulled out some cute booties and sweaters to wear, and re-decorated my desk at work with fall-themed candles and trinkets. Yet still, I wanted to do more.
So, I decided to create some faux-floral centerpieces to scatter around the house. I’m not always a huge fan of silk flowers, but with my seasonal allergies just about driving me insane, it was the best that I could do. Plus, using silk allows these decorations to last longer into the season than authentic flowers.
These mini arrangements look rustic and homey, and add the perfect natural touch to your warm home during this crisp season!
Here’s how you can make your own Fall DIY!
This post may contain some affiliate links, meaning lexisrose.com will make a small commission if you choose to purchase. This comes at no additional cost to you. 🙂
Gather Your Materials for Fall DIY Floral Arrangement:
(Note: The materials listed below are per arrangement. Because most stores don’t sell certain items individually, I was able to make about six arrangments with what I purchased.)
- A styrofoam sphere (I used 4″ diameter spheres, like these)
- Two rectangular pieces of burlap (approximately 6″x 8″ each)
- Twine (approximately 10′ or two arm-spans worth of length)
- Large silk sunflower
- Three or four small accent flowers (I chose plain white, but feel free to experiment!)
- Tidy pins
- Scissors (not pictured below)
- Wire-cutters (optional)
- Two or three toothpicks (not pictured below)

Let’s Get Crafting Your Fall DIY!
1) Begin by cutting your styrofoam sphere in half. This shouldn’t be too difficult; just use your scissors like a knife as if you were slicing a bagel. It doesn’t have to be perfect, as long as you are left with two similarly-sized styrofoam halves.

2) Next, using toothpicks, attach the two halves together at the smallest, curved ends. You should end up with an hour-glass shape. This forms the base of your arrangement and creates a flat surface for it to stand on. This and the previous step can be omitted; if you would prefer, purchase styrofoam cylinders of similar size, and continue on to the next step. (I used the spheres because a pack of six was cheaper than buying ONE cylinder at my local craft store- gotta be thrifty, people!)


3) Next, trim your sunflower stem down to about 3 inches. This might be easier with wire-cutters, but, by working at it with some force, you can use scissors successfully. Push the stem at a slight angle into the styrofoam, almost all the way down. Pluck off one of the leaves from your silk flowers and push that into the styrofoam as well, behind the flower.

4) Then, place two pieces of burlap across each other, as shown below, and place your styrofoam on top, near the center. Pro-tip: cutting your burlap in a zig-zag pattern helps to reduce fraying.

5) Now, for the tricky part (especially if you, like me, have small hands!). Gather the fabric around the styrofoam base, bunching the burlap in a few places around the middle of the “hourglass” shape. Use the tidy pins to secure the different layers together, pressing the pins down into the foam. It is important to use tidy pins, as the loose make-up of burlap allows for normal, flat pins to slide right through the “holes” in the fabric. After you have added about three pins, and feel you can “let-go” of the arrangement without the burlap coming apart, move on to the next step. It might take a few tries of locating the right place to pin.


6) Next, stretch out your cut piece of twine. Fold it in half once, and then a second time, to add some thickness and depth. Tie the folded piece in a bow around the smallest part of the burlap “hourglass” and trim the edges to the appropriate length you would like them.

7) We are almost finished! Yay! So now you want to hold your arrangement up and inspect each side. Look for spots of foam that are still visible, like below.

8) Lastly, trim the “stems” of your accent flowers to about two inches long and place them around and under your sunflower to cover the visible areas of foam identified in the last step. You can place as many or as few as you prefer; this way you can add some variety if you are creating more than one flower arrangement.

Voila- the finished product! Scatter your masterpieces throughout your home, anywhere that you want to spread some autumnal joy! I put one on our dresser…

…one on my nightstand…

…and, of course, used them in the dining room on our table and bar.


Do you have any particular way that you enjoy to decorate for the changing seasons? I’d love to hear what you do- leave me a comment below! 🙂


It’s arduous to seek out educated individuals on this matter, however you sound like you know what you’re talking about! Thanks