


This past weekend, my husband and I marked our sixth wedding anniversary! I cannot believe how time passes so quickly. Anyway, to celebrate, I baked and decorated a delicious, triple chocolate, out-of-this-world treat. Today I’ll share with you my “sun and moon” cake tutorial, so you can create one for your next dessert-worthy event!
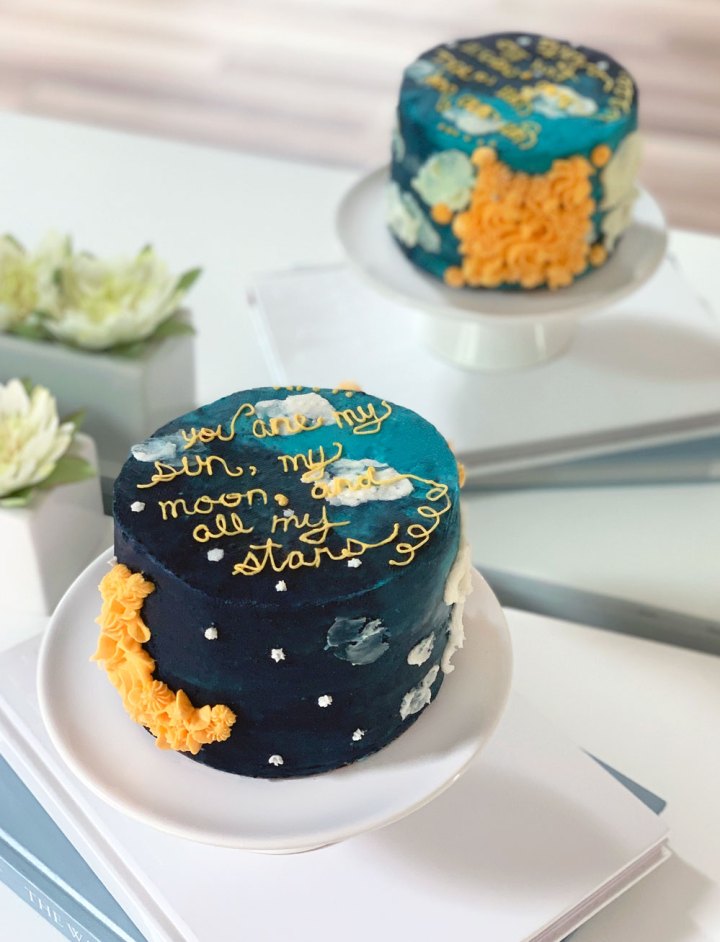
After some fruitless Instagram inspiration searching, I decided to formulate a cake concept based on a popular E.E. Cummings poem line: “you are my sun, my moon, and all my stars.” You can see a preliminary sketch on my IG story highlight, here. Basically, this blue ombre design features fluffy, palette-knife clouds; sharp, bright stars; and an effervescently yellow sun and moon, created from delicately piped flourishes and rosettes.

This post contains affiliate links, which means I may make a commission based on resulting sales. See the full disclosure policy below.
So, let’s gather some baking materials and get started!
Here are the items you will need to bake and decorate your sun and moon cake.
- Silicone baking mat – to protect your work surface from color stains
- Cake turntable, scraper, offset spatula, and regular spatula – this is the exact set I purchased, and I’m so happy with it
- 6-inch cake pans – you’ll need at least two, but preferably four
- 6-inch cake board – cardboard base for easy cake transporting (from decorating surface to final cake plate)
- Piping bags; large open star, small open star, small round, and rosette piping tips; piping coupler – the most cost-effective way to purchase these items is in a piping set like this one
- Food coloring gels – gel is more saturated than water-based food coloring, so you are guaranteed gorgeous, vivid colors
Now, prepare your cake components.
To assemble your delicious sun and moon cake, you will need to prepare the following elements:
- At least 3 layers of cake, cooled
- Any flavor buttercream for between the layers
- White chocolate or vanilla buttercream for the outside (it’s important to use white frosting so you can color it!)
Here’s my favorite recipe for all three components, but you can use any recipe you prefer.

Time To Decorate!
Once your cake layers and ganache are cooled to room temperature and the buttercream frostings are prepared, you’re ready for some decorating fun! Take a peek at my video tutorial and then scroll further for some extra tips and instructions!
Sun and Moon Cake Video Tutorial
Sun and Moon Cake Written Tutorial
Step One
Smooth chocolate buttercream on the first layer of cake, piping an extra ring around the outside edge to create a “dam.” Make sure there are no gaps through which the ganache filling could seep. Spoon the ganache generously into the center of the first layer.
Step Two
Carefully place the middle cake layers onto the first, and repeat the process with the chocolate buttercream and ganache.
Step Three
Flip the final cake layer upside down before placing it atop the rest. Typically, the bottom of the cake has clean, straight edges, formed by the cake pan. By inverting the layer, you create a smoother, sharper surface to frost. This allows for crisper edges after applying the buttercream and an overall cleaner appearance.
(Eagle-eyed viewers might notice that in the photo of my cake, I only have three layers, even though the recipe accounts for four. I simply reserved one of the layers to make and freeze cake balls for another time!)

Step Four
With an offset spatula, apply the sky blue frosting to about two-thirds of the cake. It doesn’t have to be very neat at this point. Then, wipe the spatula clean, and apply the dark blue frosting to the remaining unfrosted area.
Mix a small amount of light and dark blue frosting to create an intermediate tone. Then, apply it to the two areas on the cake where the light and dark shades meet. This will soften the color fade and create the appearance of an ombre sky.
Step Five
Hold the straight edge of your scraper perpendicularly against the side of the cake and, beginning with the lightest section of sky blue frosting, smooth out the buttercream. It won’t be perfect at first – and that’s okay.
However, don’t scrape the buttercream around the full circumference of the cake like normal; doing so will smudge darker frosting into the lighter and muddy the fresh, bright color. Instead, smooth half of the buttercream at one time, and then adjust the grip of your cake scraper and start again in the light frosting, this time, rotating the opposite way.
Step Six
If, and where necessary, use an offset spatula to fill in holes and add more color to brighten, blend, or darken the ombre sky picture. Continue to scrape around the cake until you achieve an even, blended finish. Feel free to allow some variation in streaking and color, as a normal sky isn’t typically just one shade of blue. Let your artistic side take over!
At this point, use your spatula to apply frosting to the top, too, and blend in a similar way. I like to use a rounded edge of the cake scraper to gently pull frosting from around the edges onto the top of the cake, towards the center. If your buttercream on top has begun to “crust” or harden, you can lay a paper towel on top, and gently press down with the back edge of a spatula to smooth the surface further.
Step Seven
Next, scoop a small amount of white frosting on a thin offset spatula, and gently press it into the cake. Release, pull away, and repeat at different angles to create the look of palette-knife painted clouds.
Using a small, open star piping tip and some of the remaining white buttercream, add short bursts of stars around and on top of the dark frosting.
Step Eight
Decide where you want your sun and moon design to go. Use a toothpick to lightly scrape a sketch into the buttercream, creating a guide for piping. You can also use the toothpick to gently remove any clouds or stars that happen to fall into these areas.
Then, begin piping a few large yellow rosettes into the sun and moon guide by moving the tip in a spiral motion. Next, using the same tip add some smaller drop flowers, by pressing and releasing the piping bag without any rotating. Finally, repeat the drop flower motion with the large star tip, filling in any leftover, open areas.

Step Nine
With a toothpick again, roughly plan out the text for the top of your cake. I chose to use the line “you are my sun, my moon, and all my stars,” but you can choose whatever best expresses your feelings or fits the event. Affix a small, round piping tip to the bag with yellow frosting and carefully trace over your toothpick-ed words.

How To Enjoy and Store Your Cake Leftovers
Feel free to save your delicious dessert covered, at room temperature, for a few days. That is – if there are any leftovers for saving! The cake is so moist and the buttercream is stable enough to keep this treat just as tasty as it was right out of the oven, three or four days later.
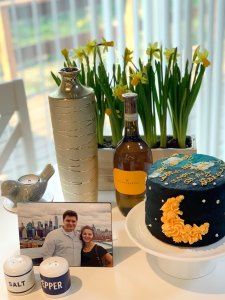
Max and I have enjoyed munching on this cake for the past few evenings. It has helped make our anniversary in quarantine (#ThanksCOVID) a little bit more special. Plus, this is definitely one of my favorite cake recipes – ever! I just love the perfectly balanced chocolate flavors, as well as the creamy ganache filling and not-too-sweet cake base.
I hope you love this treat as much as we do! Oh, and be sure to tag me on Instagram in any photos you post of your sun and moon cake! I love to see your works of culinary art!!
If you’re looking for another great chocolate dessert, be sure to check out my recipe for Mocha Cupcakes – these things are addictively delicious!

And, enter your email below to receive notification of my next blog post like this one. You don’t want to miss it!
Take care guys! Until next time…
XOXO

P.S.
See my privacy policy for the full Amazon Affiliate disclosure. Profits earned from affiliate commissions help to keep this site running, so that I can continue to bring great content to awesome readers, like you! If you would like, you can still support by clicking through this link and making any other purchases you need. 🙂
P.P.S
Addicted to Pinterest, like me? Pin an image below to save this recipe for later or show it to your friends. After all, sharing is caring. 😉


this is too pretty to eat! so instaworthy!!
Thanks so much! 🙂
What a cute cake! It looks so decadent! And now I want chocolate cake for lunch. No shame, right?
Haha, no shame indeed!! 🙂
This looks absolutely delish! I don’t know that I would be able to take the time to decorate it like you did here as I would be too impatient to eat this triple chocolate cake. You had an amazing idea for celebrating your anniversary and the whole concept is romantic and adorable.
Thank you so much!