


Hey, there!
These past few weeks, I have been super into baking. Blame it on the cold weather, but I just cannot resist the urge to get in the cozy, warm kitchen and create something sweet!
One thing I love the most about baking (besides EATING said baked goods, of course) is decorating! Mixing frosting colors, piping neat designs, and molding fondant is so artfully satisfying and, to me, a bit cathartic.
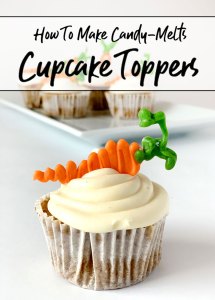
Today I wanted to share my favorite, easy way to add a bit of flair to your desserts: candy-melt cupcake toppers! These are SO easy to make, dry quickly, and only require a few materials. Even your kids can get in on the fun!

Not to mention, you can make these sweet, decorative bits into virtually any shape, size, and color. So get ready for your next theme-party, family get-together, or school bake-sale, because these babies are going to be a hit!
Let’s get started.

This post contains affiliate links which means our site may make a commission based off resulting sales. See below for more information on this policy.*
You’ll Need The Following Materials For Your Cupcake Toppers:
- Wax paper
- Candy melts in any color you need for your design (you can purchase a large bag and save the remaining melts for another time, or consider buying a small “Drizzle Pouch” for details/colors you only need in a small quantity)

- Small snack-or-sandwich-sized plastic bags
- Black writing gel (optional – good for pupil-of-eye detailing on characters; don’t use in place of candy melts)
- Microwave safe bowl
- Spoon
- Scissors
- Thin pastry knife/spatula
- Finished and frosted cupcakes, cake, or other dessert!
- Optional template to “trace” (I talk about this later, and inclue a free downloable for you)
Preparing To Make Your Cupcake Toppers
First, set-up your work station. Roll out a piece of wax paper and secure the edges down, if neccessary. Then you will slide your template (if you’re using one) underneath the wax paper. As a result, you will be able to trace over the lines of the design, helping each topper keep the same size and shape!
You can use your home computer to print off basically any form, character, logo, or word found online onto a piece of paper and use this as your template!
Make sure the design doesn’t have too many small details though, as simpler shapes will be easier to follow. Try searching your keyword, followed by “outline” or “clipart”, i.e. “football clipart” and “Elmo outline”.

Feel free to get creative with your search! Here are some fun ideas to look for:
- Find a script/cursive design for a name, or small celebratory message, like “Congrats”
- Favorite sports team logo or symbol (Iike a baseball or basketball)
- Child’s favorite character
- Superhero logo/shield
- Thick, block numbers for events like an anniversary
- Rings and/or hearts (for wedding/engagements)
- Animals or paw prints
- Flowers
- Food (maybe match the cupcake topper to the flavor, like with a strawberry, or, in my example, carrots for carrot cupcakes)
Click here to download my printable template with fall and winter shapes, likes leaves, a cup of cocoa, a snowman, and more! It’s totally free for all my great readers. You can thank me, later! 🙂
If you are feeling more artsy and adventurous, you can sketch out a design yourself and use that as the template.
Making The Cupcake Toppers
Begin with your “base” or predominant color. I wanted carrots and pumpkins, so my base color is orange! Next, heat the candy melts according to the package directions. I microwaved mine in a bowl, stirring a few times in between.

Make sure not to overheat the melts, and only warm what you need. Because they start to harden quickly, if you heat all of your colors at once, they may start to solidify in their bowls. However, I was able to use two colors at the same time successfully.
If you are using a Drizzle Pouch, you can go ahead and snip off one corner of the bag and start tracing! However, if you melted your candy in a bowl, you need to transfer it into a sealable bag, and cut off a tiny corner. Always start small; you can cut more off later, but you can’t make the opening smaller again!
Next, trace over the outline, onto the wax paper, as if you were piping frosting on a cake. It helps to let the melted candy lightly “fall” onto the surface, rather than dragging the edge of the bag along. Then, simply slide the template to a blank spot on the wax paper to repeat the shape again.
Continue the same method to add any subsequent colors and designs onto your cupcake topper. Make sure that any edges overlap slightly so that the piece dries together as a unit (for example, I overlapped the green and the orange of the carrot so that the “stem” would stay attached!)

Also, it helps to keep the pieces a little thicker; thin strands of candy will be more delicate, making them prone to breaking.
The candy will start drying at room-temperature almost immediately and it will be fully hardened within 15-30 minutes. After that time has passed for the last layer of color you added, gently slide the pastry knife under the design to pop it off the wax paper, and carefully place it onto your cupcake!

And, Voila!
In just a half hour, you’ve taken plain cupcakes from “meh” to *HEART EYES* with a simple, personalized, candy melt cupcake topper.


So leave me a comment below if you have any questions, and let me know what design YOU want to try out!
And, if you’re inspired to get baking now, be sure to check out my Mocha Cupcake recipe by clicking here – they’re my favorite cupcakes ever.
Oh! Don’t forget to find me on Instagram so we can keep in touch, and enter your email below to receive notification of my next blog post like this!
As always, thanks for reading!
XOXO,

*See my privacy policy for the full Amazon Affiliate disclosure. Profits earned from affiliate commissions help to keep this site running, so that I can continue to bring great content to awesome readers, like you! If you would like, you can still support by clicking through this link and making any other purchases you need. 🙂
P.S. – Forgetful like me? Pin one of these for later!


Absolutely adorable and they look so easy to make! I love that you can make one for pretty much any occasion!
Exactly, you can get so creative with it! Thank you! 🙂
How long will they store for in a sealed container? I’m going to need at least 100 and want to start making them 🙂
Sealed in a cool, dark place, Wilton’s website says they will last about a month. Some users do notice fading in the colors after about three weeks, though. Hope this helps! Can’t wait to see what you make! 🙂
This are amazing…. I love it. I need to practice this!
You’ll get the hang of it for sure! It’s simple 🙂
this is such a great idea, my daughter’s second birthday is coming up and I am gathering inspiration, definetely pining this for later, thanks for sharing.
Thanks so much! She’ll love them 🙂
These are so cute! I love how simple they are to make, yet really bring a fun look!
It’s so true!! And thanks 🙂
Eeeekkkkk! So THIS is how you do it??!! Yayayay thanks for explaining it so well. My birthday is next month so maybe we’ll try to make some of these as a family!! XO
Yep this is it!!! Thank you! 🙂
Just beautiful! Wow! 🙂 I love this – you are so clever. What gorgeous looking cake toppers.
Thanks a bunch!!
This is so wow… I love this recipe. I love cupcakes.im really gonna try them out.
Aw yay! Thanks. 🙂 I’m sure they will turn out GREAT!
These are really cute! Thanks for sharing such a creative idea. I am going to have to try this!
Thank you so much! Can’t wait to see how they turn out. So many options to create! 🙂
This is something I haven’t tried making yet. Something I really want to do. You make it look easy enough so will follow your instructions and give it a go.
Let me know what you decide to create! I know you will love it! Thanks 🙂
OMG you made these look so easy.. I love these never seen anything like it before.
It looks easy because it IS easy 😀 You totally could do it no problem! And thanks 🙂